| 510-43 |
Install and Test PCI 16 Photo/16 Relay Card on Linux
This page describes you how to install and test PCI 16 Photo/16 Relay Card on linux.
1. Install the driver
1. Instal1 the driver
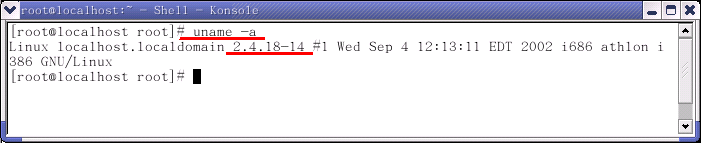
This sample is under REDHAT 8.0 KERNEL 2.4.18-14.
You can do it in the ' text-mode ' or use the Terminal of System tools in ' graphic-mode '.
1.1 Download Device Driver
Download driver from as follows:
dpci16in16out_2.2.14.tgz for KERNEL 2.2.14 release Date:2003/3/05
dpci16in16out_2.4.18.tgz for KERNEL 2.4.18 release Date:2003/3/05
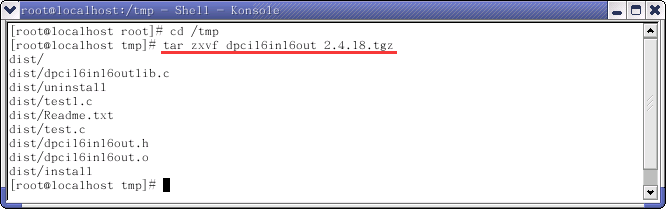
Download the driver to /tmp
You can use 'uname -a' command to check your kernel's version.
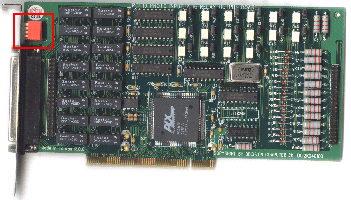
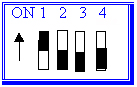
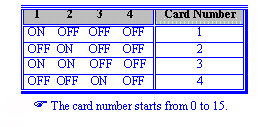
1.2 DIP Switch set
The switch is used to identify card number, default setting is card 1. There are two methods to set
the card number:
1.2.1 PnP mode
Just plug in PCI bus adapter into PCI slot, the PCI BIOS will allocate I/O address to each adapter
automatically and assign card number start from 0 to each adapter. However, if you plug in more
than one adapter, please set whole adapters to card number 1 (default setting), then use software
tools to distinguish port id.
1.2.2 Manual mode
Set card number by card identifier switch, the PCI BIOS will assign pre-allocated I/O address to each
adapter. Please set different card number to each adapter (do not duplicate card number setting).
1.3 Instal1 step
Step 1: Extract the file
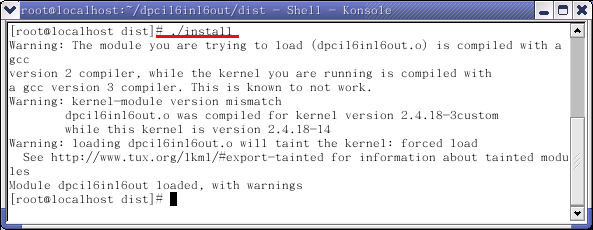
Step 2: Execute the install file to install
Step 3: Please use "lsmod" command to check
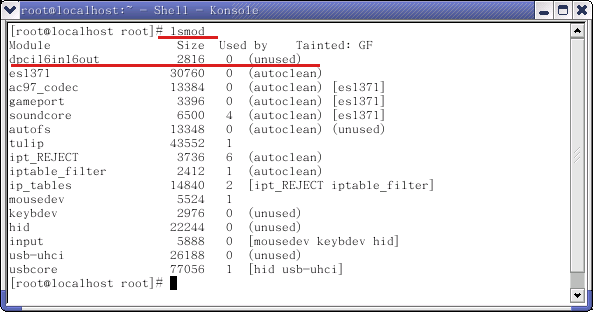
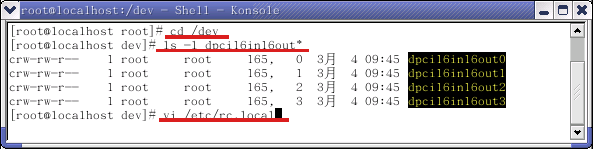
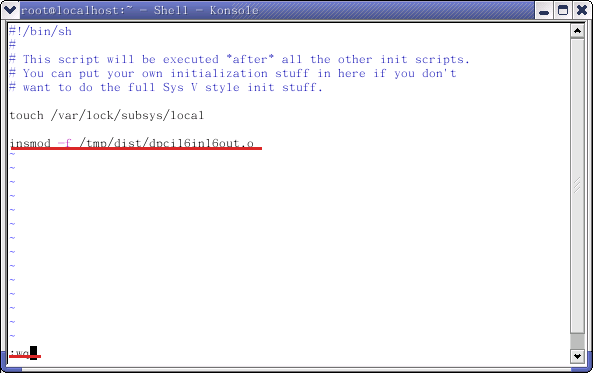
Step 4: Please edit /etc/rc.local to add a command line as follows:
Step 5: Please reboot systems.
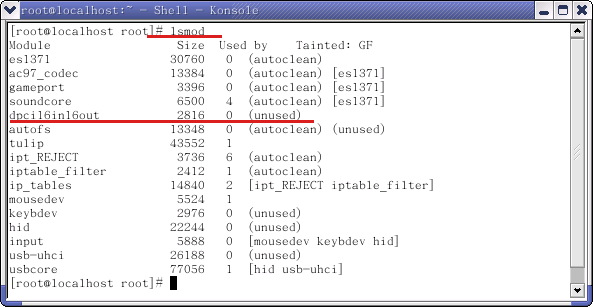
Step 6: Please use 'lsmod' to check after system restarted. You can find PCI 16 Photo/16 Relay.
2. Uninstall the driver
If you want to remove the driver.You can use 'ls' command to find 'uninstall' file.
Then execute the file.

3. Salf test the card:
3.1 The test method
The 'LOOPBACK TEST' is a diagnostic procedure in which a signal is transmitted and received
through all or portion of a circuit.The received signal is compared with the transmitted signal in
order to evaluate the integrity of the equipment or transmission path.
3.2 The Loopback test tool
For testing you need to prepare a test tool.You can do it as follows:
3.2.1 DB37 Connector assignment
According to DB37 Connector Assignments , you can make a lookback equipment to test the card
is warking properly.
3.2.2 The circuit figure
According to DB37 Connector Assignments ,we draw the circuit figure.
In order to show the result of the test, we add sixteen LEDs.
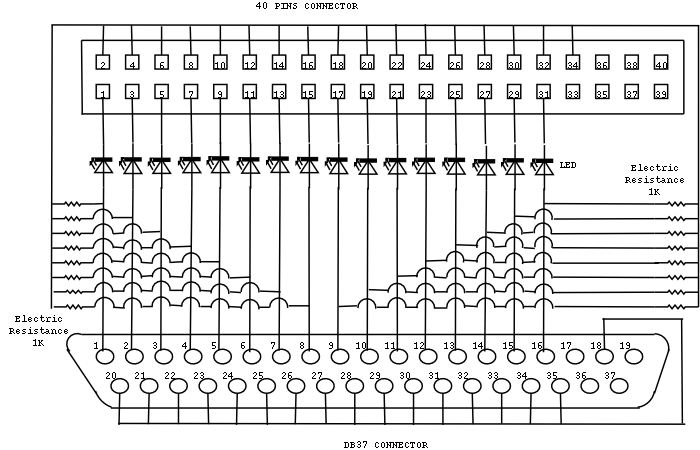
3.2.3 The Finished Product
In the sample ,you need some materials as follows:
DB37 CONNECTOR (Male) x 1
40 PINS CONNECTOR x 1
LED x 16
RESISTOR NETNORKS x 2
( or ELECTRIC RESISTOR ( 1K ) x 16 )
wine (1mm)
3.2.4 The usage of the loopback test tool
The usage of the test tool can refer to the following figure.
3.3The test program
The device
driver already includes three test programs.
1.test.c: Auto tests Relay Output ON/OFF.
2.test1.c: Auto tests Relay Output and Photo Input.
3.test2.c: Manuly tests Relay Output.
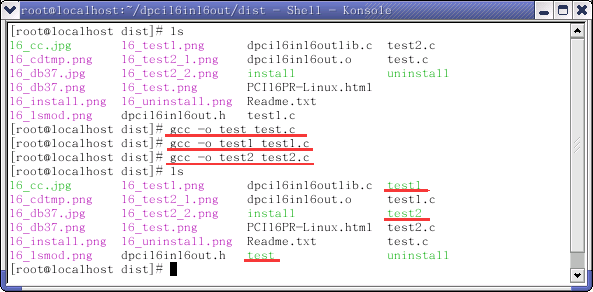
3.3.1 Compile the test files
Please compile
the 'test.c' 'test1.c' 'test2.c' files as following step:
Then it will create the 'test' 'test1' 'test2' file.
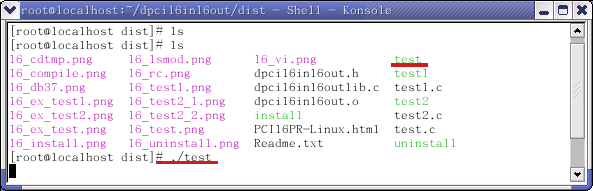
3.3.2 Execute the test file
Please execute the 'test' file to test Relay output. You will see Led light from L1 to L16 Auto ON and OFF .
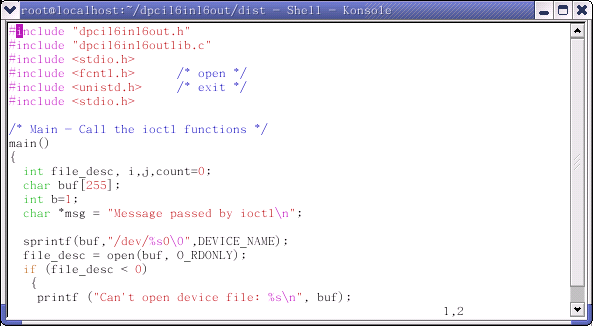
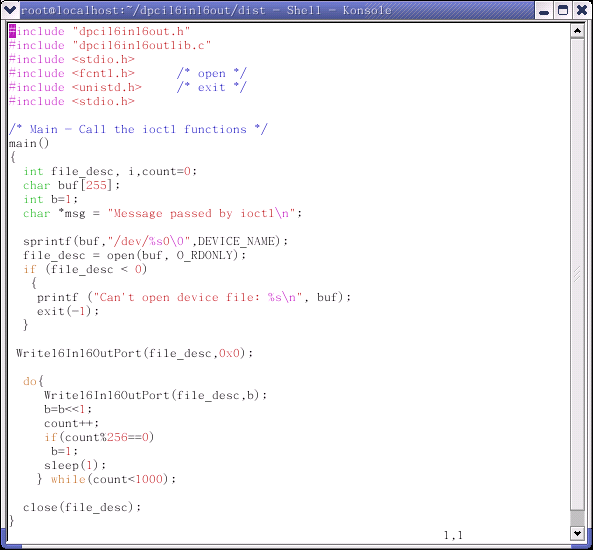
The test.c's content is as follows:
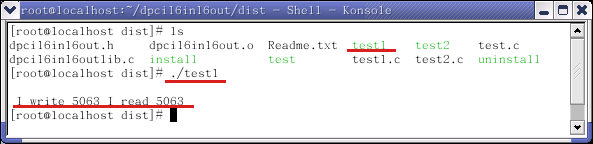
3.3.3 Execute the test1 file
Please execute 'test1' to test Relay and Photo. The result is as follows:
The test1.c's content is as follows:
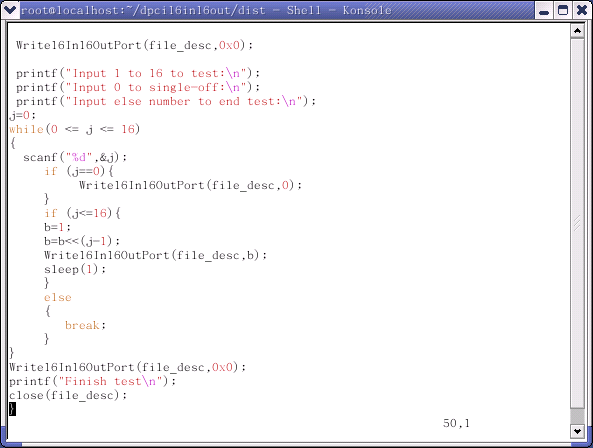
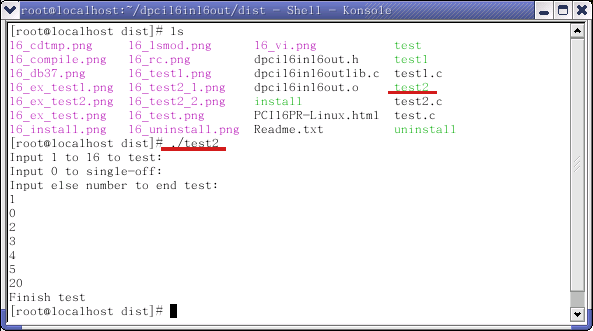
3.3.4 Execute the test2 file
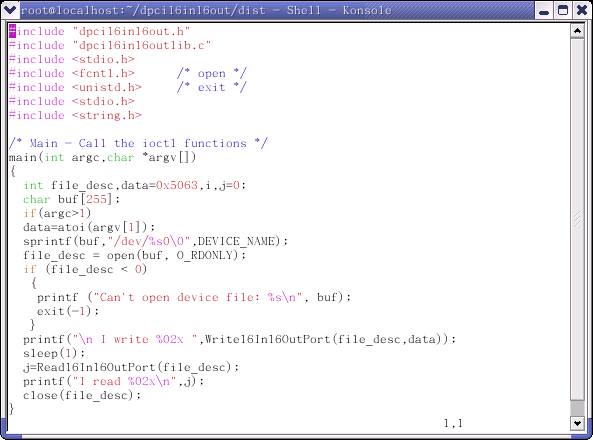
Please execute 'test2' to test Relay . The result is as follows:
The test2.c's content is as follows: